As we know there are many issues, we face every day where data is not correct, and we need to write small script or runnable job to correct that data. But to do we need downtime in production and complete package deployment and build process is needed which is quite time taking task.
Here with 10.0.25 version Microsoft has given new feature which will help to correct data without any down time required.
You can check Microsoft document for complete details and feature availability.
Run custom X++ scripts with zero downtime – Finance & Operations | Dynamics 365 | Microsoft Docs
Here I m going to explain step by step process, how you can use this functionality.
First process would be, you needed to create new model using model management and add reference module like application suite, application foundation and any other model if required.

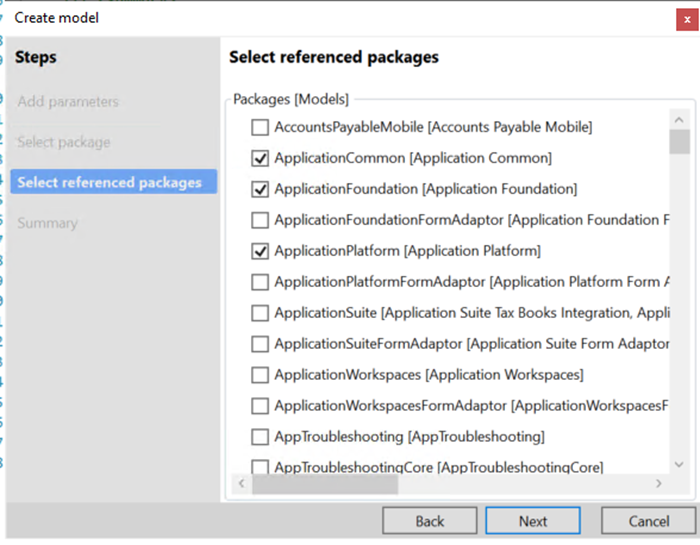
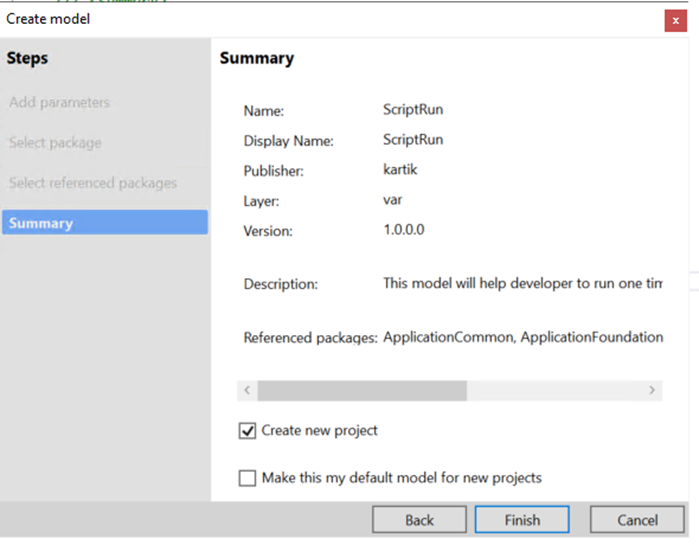
Once you are done with model creation, create new project in visual studio and add runnable class.
Note: Make sure your new model should have only one class.
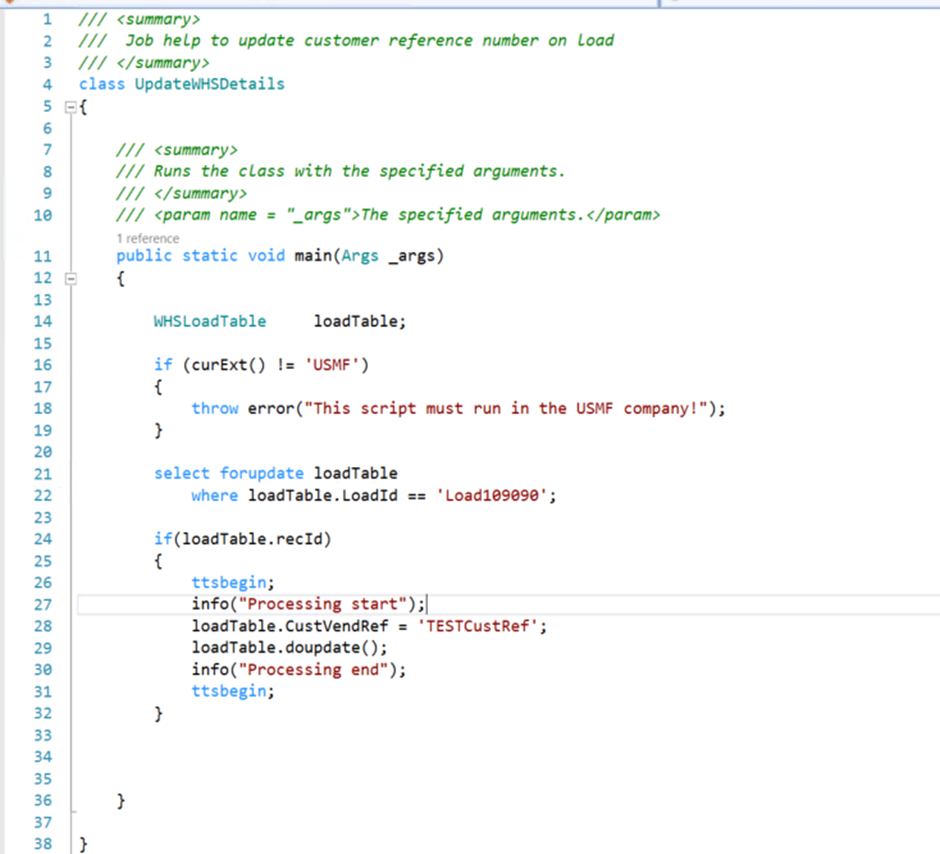
Here I have created one class to update some information on load Table
Next setup is building your code and test in DEV box. Once you are done with testing next setup is create deployable package using Visual studio.
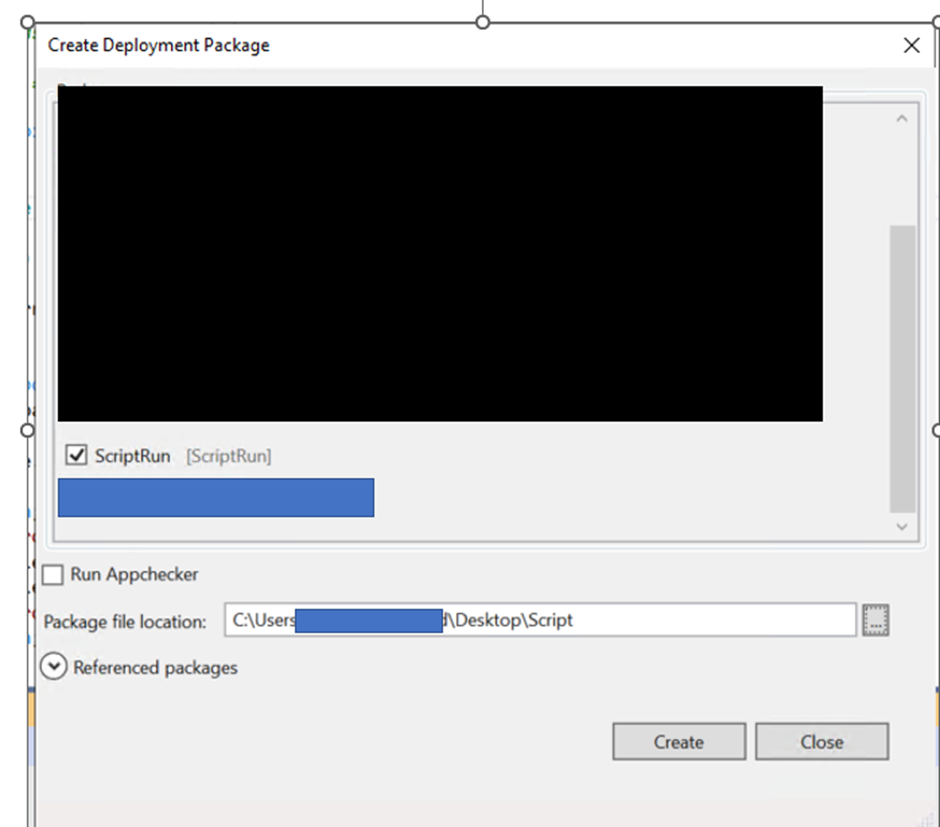
Here you must select custom model which you created for script execution and create package.

Next step is to upload same in sandbox on following path
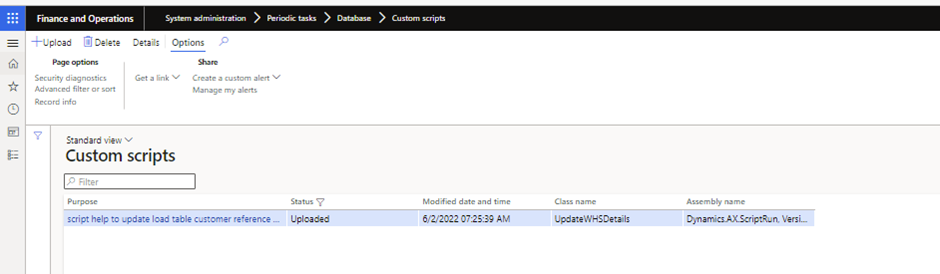
In your Finance and Operations app, go to System administration > Periodic tasks > Database > Custom scripts.
Select Upload.

Once upload is done you will see package details in grid, verify class name.
After upload, some other user or admin need to approve your package before doing execution.
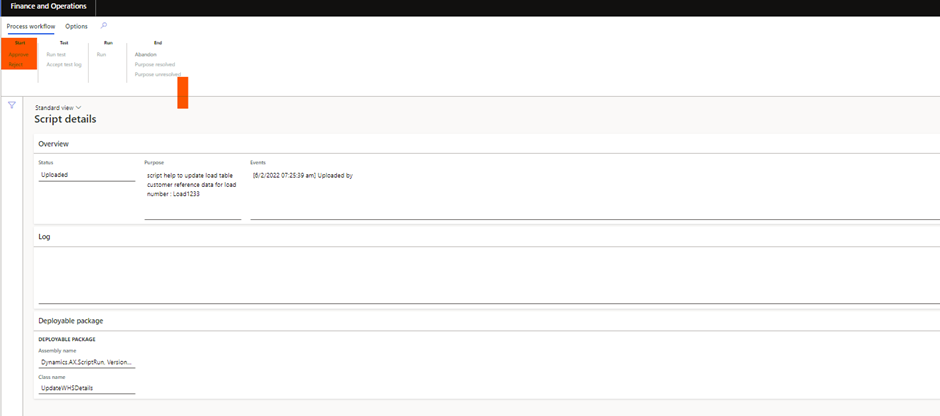
Once this is approved you can check package status change from upload to approved.

Till here we are good and now its time to do some testing and verify using log, You will see two options
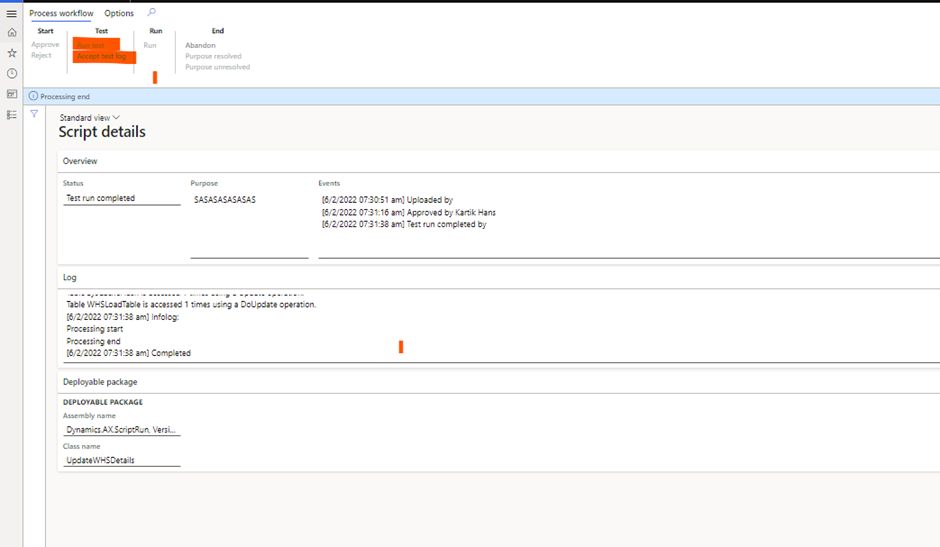
Once you are done with testing ,verification of test log and check all info messages, if you are ok with info log and result, You need to click on Accept test log, as I highlighted in above screenshot.
Now it time to run query in check result by clicking run option and verify your result.
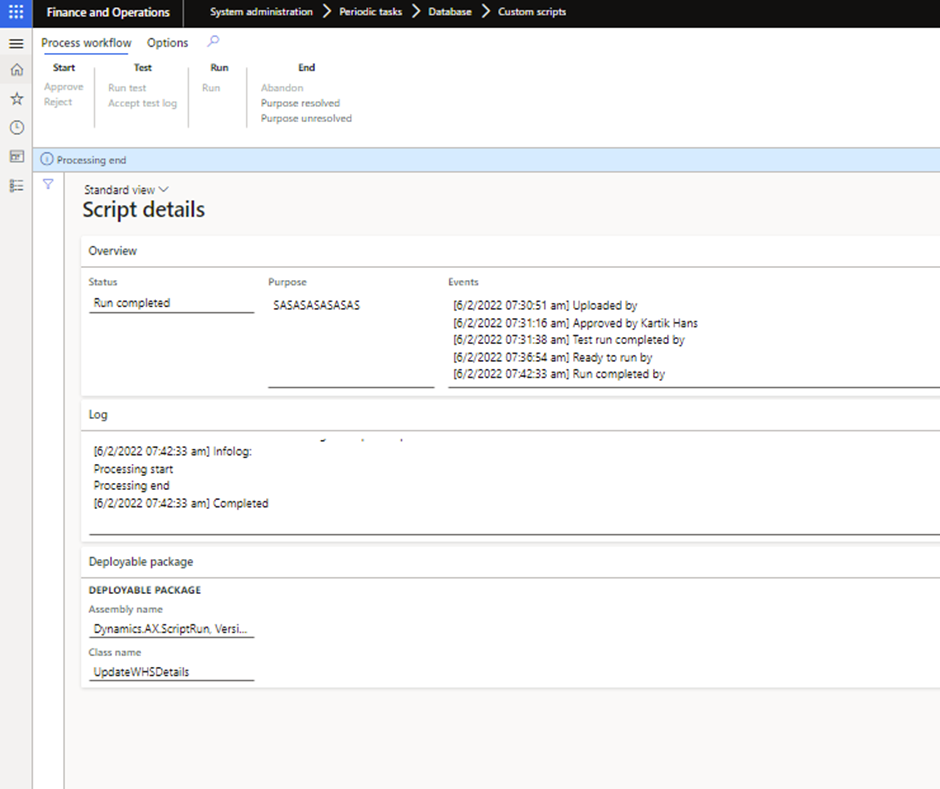
If you are ok with result you can mark Purpose resolve and you are done.


Leave a comment